Here is another great craft to make with a small piece of fabric. Everyone needs a pretty place to store their plastic bags. I made a bunch of these for my craft show next week to!
Supplies Needed:
1 fat quarter
thread
1/4 in elastic about 6 inches long
Press your fat quarter so there are no creases. Next fold in half long ways.
Sew down the side leaving about a 4 inch opening at each end.
Fold the end of the fabric over and pin down. Repeat on other end of fabric.
Sew down .
Where the 2 pieces of fabric meet is where you are going to put your elastic through. The best way to do this is to use safety pins. Put a safety pin at the edge of your elastic.
I also pin the the other end of the elastic to my fabric so I don't lose it.
Work the elastic all the way around using the safety pin to hold on to. Sew the ends of the elastic together..
Repeat at the other end but sew your ribbon on first so you can hang it on the wall.
After the elastic is sewn on both sides turn inside out and your finished! So simple but so useful!
Showing posts with label craft shows. Show all posts
Tuesday, January 14, 2014
Tuesday, November 12, 2013
Purse Tissue Holder
I have a craft show coming up on the 19th and I was trying to figure out what to make with all this scrap fabric I have. I finally decided to make some of the tissue holders. They are simple to make and don't take a lot of time. Best of all it will use up some of that fabric that you have kept because it was to big to throw away but yet still to small to make a lot of projects with!
First you need to cut 2 squares of fabric that measure 6 3/4 in by 7 1/2 in. Pin together with the right sides facing together ( which means the fabric that are you are looking at is the wrong side)
Sew around all 4 sides but leave a 2 inch opening on one side to turn inside out.
Turn inside out and press with iron if needed. Sew opening shut.
Bring the two ends of the fabric ( your short side) together, overlapping slightly. Pin and sew the edges of the fabric together.
Turn inside out and you have a tissue holder!
Tuesday, October 22, 2013
Pixie Stick Wands
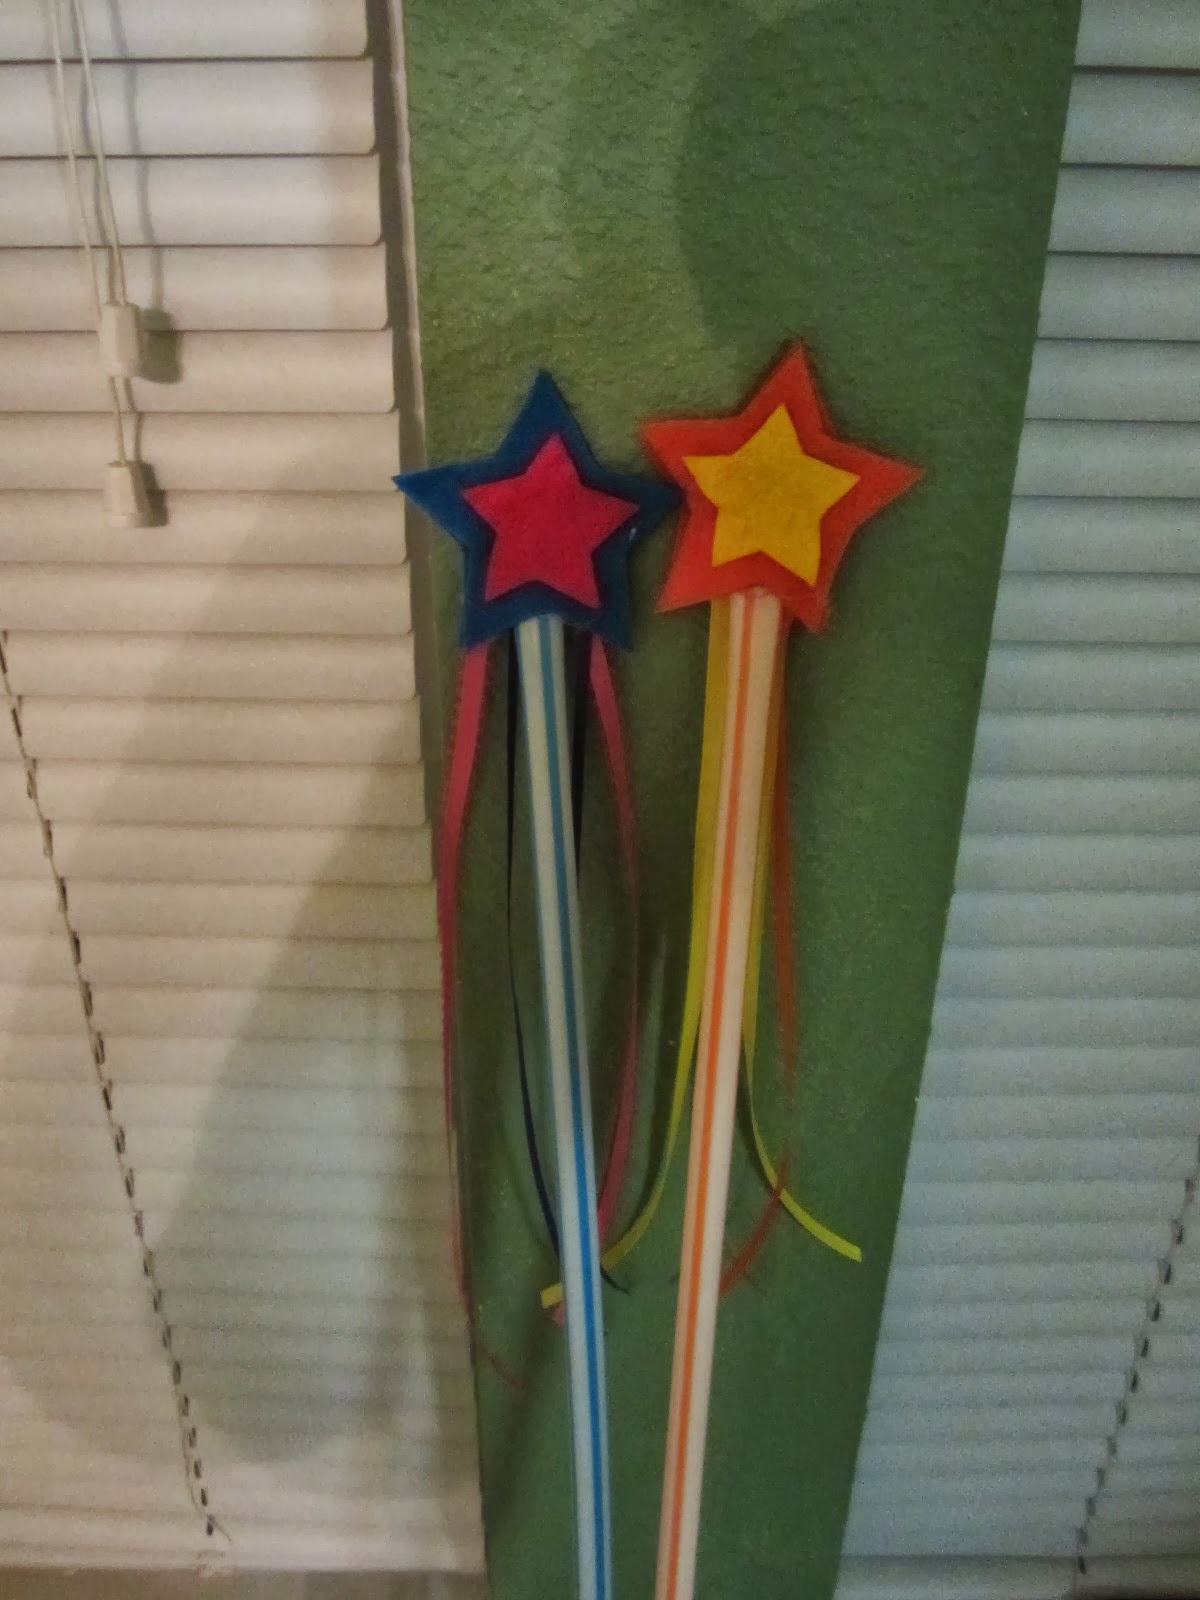
I was trying to come up with an idea to take the craft show we did on Saturday that little girls would like. My mind kept going to wands but I didn't want to do them with dowel rods. I thought about it and decided to do them with those large pixie sticks you can buy ( I bought them at Sam's Club). I added some cute felt stars to the top and added some ribbon. I think they turned out really cute. The funny thing is that the first kid who bought one was actually a boy scout who was at the show buying popcorn. He just wanted the candy lol.
Here is how to make the wands.
First cut three stars out making two larger and one smaller. I this case I would have cut 2 orange and 1 yellow
Hot glue the yellow star onto the orange star.
Do not glue the two orange stars together yet!
Cute your ribbon to go inside the stars. You can make it as long or as short as you want. I used 4 strands of ribbon for each but again you can make it to your liking.
On your large star put a small line of hot glue
Lay ribbon down
Hot glue all over your star except the bottom of the star. This is where you will stick the pixie stick in.
Put your two orange stars together now.
At the opening stick your pixie stick in. Secure with a dab of hot glue.
I am weird and need everything to match so I had my ribbon and stars match the color of the pixie stick.
Enjoy!
Thursday, September 19, 2013
Homemade Gel Air Freshners
I have been in a crafty mood lately. I think it is due to the fact that I know our craft shows will be starting soon. Anyways I decided to make some gel air fresheners and I am glad I did, they smell wonderful!
Materials needed:
2 pkgs of unflavored gelatin
1/2 cup hot water
1/2 cup ice cold water
food coloring
fragrance of choice
Mix the gelatin with the hot water. Stir until dissolved.
Add food coloring and fragrance. Then add ice water.
This is the fragrance that I used. I doubled the recipe and used the entire bottle.
Pour into jars and let sit in a cool place ( not the refrigerator!)
How easy is that??? It took mine around 24 hours to set up then I put lids on them and they are ready to go. My jars were 4 oz and I got 5 filled by doubling the recipe for it.
Monday, March 4, 2013
Super easy and cheap craft show display
So Scott and I where shopping the other day and he got the crackers he wanted to try well when I opened the box I was left with this. My first thought was it would make A GREAT DISPLAY BOX. Not really great for jewelry but for something. Then I thought about Mindy and some of the stuff she sells at craft shows would be great in this.
So I got out the old stand by Mod podge and some paper and in less than ten minutes I had something that I think she will like.
Here is what I did first I put to pieces of paper together blank sides facing each other
then I just free hand cut it with scissors leaving a little space around the box.
I then cut the pieces for the back and front. Like so.
I then started mod podgeing starting with the back then the sides and last the front.
I didn't do the insides right now the box can fold up for easy storage. Mindy can decided if she want to do the inside of the box.
this is what I ended up with
sorry the mod podge is still wet but I wanted to get this up today.
Stephanie
Wednesday, October 17, 2012
Whatever Wednesday Pictures from the craft show last weekend
![]() |
The shutters in use. What do you think? I really like them. |
![]() |
this one has necklaces on it |
![]() |
close up of earrings on shutter |
![]() |
I love this necklace |
![]() |
printers boxes |
![]() |
mindy gave these to me I love them just fill them up and stack them in the car. |
![]() |
when you get to the show pull them out and put them on the table ready to go |
![]() |
Scott sleeping. Someone accually thought he was a stuffed man for halloween. |
![]() |
Mindy and Jane setting up |
![]() |
Mindy and Jane's booth |
![]() |
Jane is thinking Mindy has to much stuff here lol |
![]() |
Part of Mindy's booth and some random lady in the background |
![]() |
We had way to much stuff for that size booth |
![]() |
Jane flirting with the WFMS ( radio station) guy |
Stephanie |
Subscribe to:
Posts (Atom)