Showing posts with label candy. Show all posts

Monday, May 5, 2014

Teacher Appreciaton DAY 1

It has been forever since Stephanie or have blogged. Life has gotten in the way and we have gotten busy with our  families, work, etc. What a better way to jump back into it though than Teacher Appreciation!  I am on the PTO at my girls' school so I am in charge of doing gifts for all the teachers in the school and the IA's. I also have to come up with gifts for my kids to take to their teachers. It is challenging to come up with so many different ideas but I think I was able to do it this year!

From the PTO I sent in these cute little pudding cups with the saying Thanks for pudding your heart into teaching ( or being an IA depending on who received it).
 From my girls I had them take in these vases filled with Hershey kiss roses. What a pain they were to make but they turned out adorable!
Check back tomorrow for more ideas!

Thursday, October 31, 2013

halloween candy ideas

Hey everyone I made these for a craft show I did and they sold like hotcakes.  So I thought I would share idea for something special for the kiddys. 
 First is Mummy Hershey bars. Hershey bar crate paper and googly eyes
 Scarecrow candies M&M sand Sixlets
and Monster popcorn construction paper google eyes microwave popcorn

Tuesday, October 22, 2013

Pixie Stick Wands

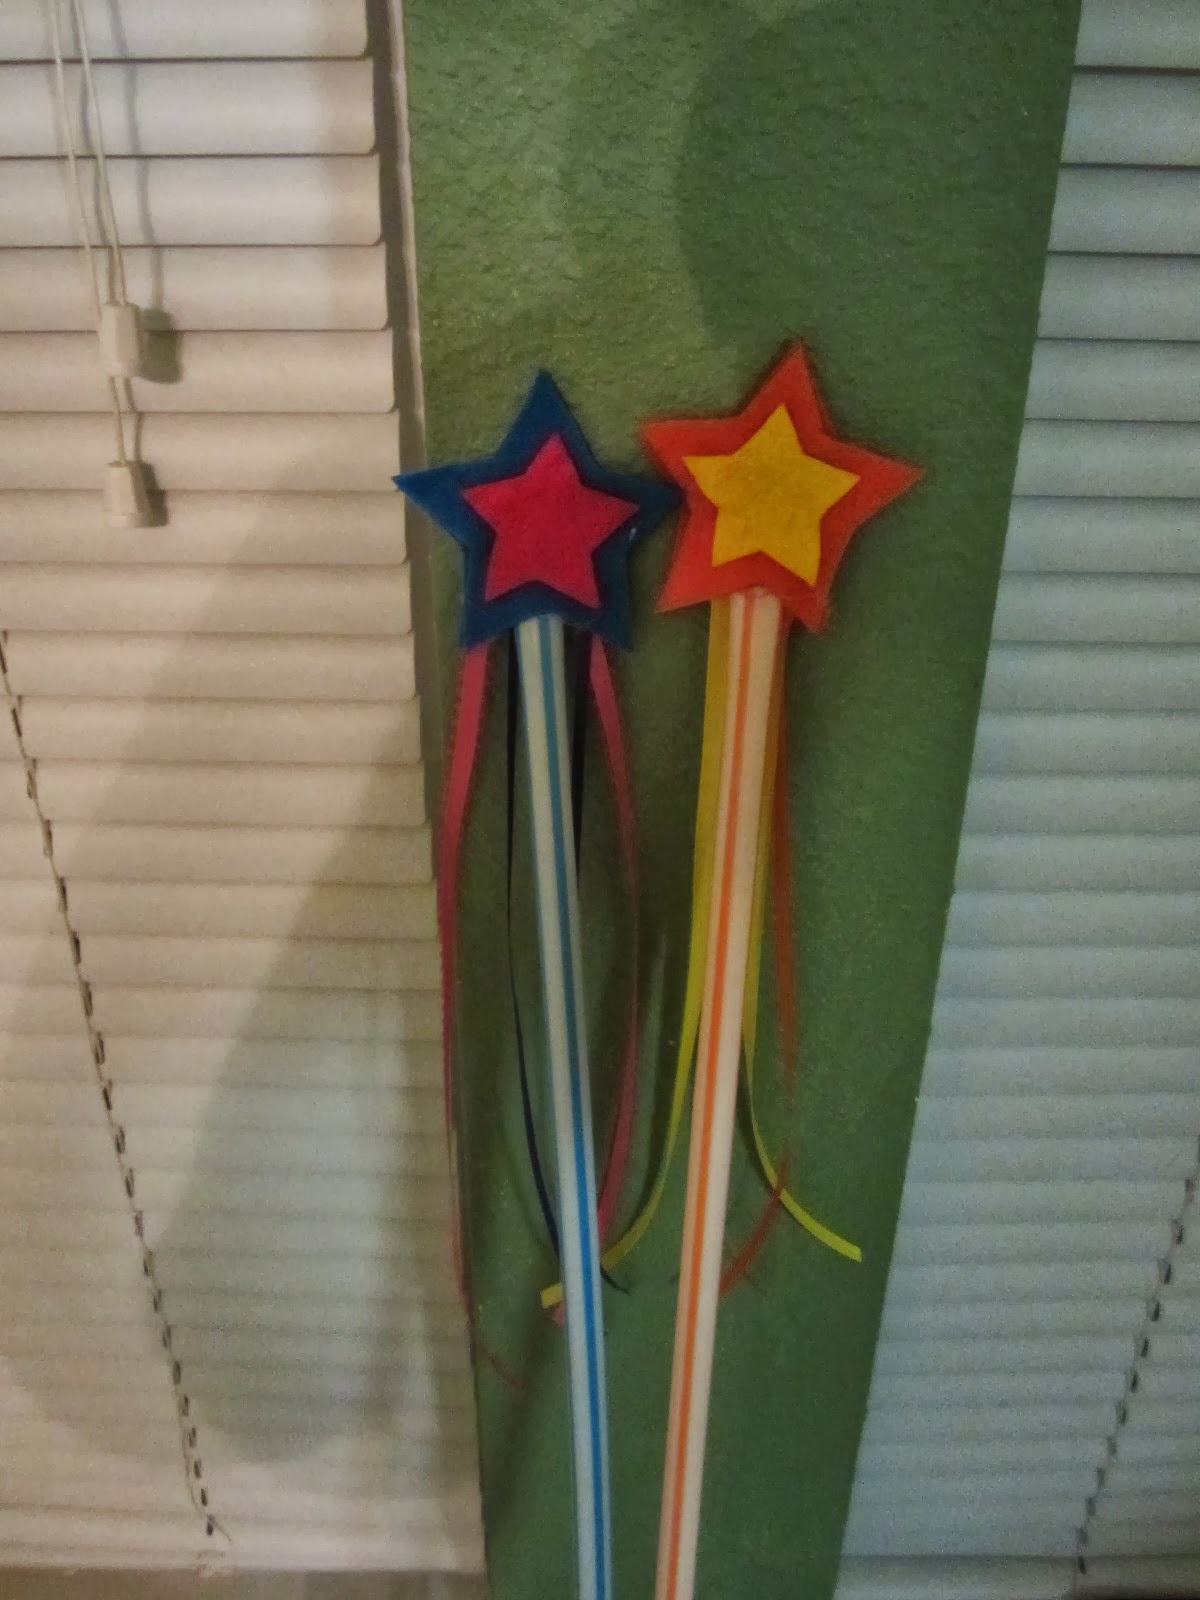
I was trying to come up with an idea to take the craft show we did on Saturday that little girls would like. My mind kept going to wands but I didn't want to do them with dowel rods. I thought about it and decided to do them with those large pixie sticks you can buy ( I bought them at Sam's Club). I added some cute felt stars to the top and added some ribbon. I think they turned out really cute. The funny thing is that the first kid who bought one was actually a boy scout who was at the show buying popcorn. He just wanted the candy lol.
Here is how to make the wands.
First cut three stars out making two larger and one smaller. I this case I would have cut 2 orange and 1 yellow
 Hot glue the yellow star onto the orange star.
 Do not glue the two orange stars together yet!
 Cute your ribbon to go inside the stars. You can make it as long or as short as you want. I used 4 strands of ribbon for each but again you can make it to your liking.
 On your large star put a small line of hot glue
 Lay ribbon down
 Hot glue all over your star except the bottom of the star. This is where you will stick the pixie stick in.
 Put your two orange stars together now.
 At the opening stick your pixie stick in. Secure with a dab of hot glue.
I am weird and need everything to match so I had my ribbon and stars match the color of the pixie stick.
 
Enjoy!
 

Friday, May 3, 2013

Teacher Appreciation Week ( Day 5)

Today I am going to share with you the final gift that I have made for my daughters school. Next week I will let you know how well they liked them. Before we get to that gift here is a review of what I have already shared this week


Donuts

Popcorn
Yoohoo drink

the poem to go along with it

 
The cup of mints

The poem to go with it
For day 5 we have soup mugs. Because I couldn't find 26 of either one of these mugs I had to get 2 different kinds. Here is what they look like and the poem that goes with it. If I can find some individually wrapped crackers over the weekend I will add them to the soup.

I opened the lid on these and stuck the soup inside.

I also wanted to share some ideas for the assistants for the school. I think they get overlooked a lot but they play an important role in the classroom.
starbursts

dum dum suckers

goldfish crackers. I will package these up in seperate packages closer to time

mints

fortune cookies
I hope some of these ideas helped you out!

Thursday, May 2, 2013

Teacher Appreciation Week Day 4

 I have given you 3 ideas so far for teacher appreciation week. Today I am going to show you number 4. Again it is cheap and easy to do and I like that fact that it is good for a male or female teacher. For this project all you need is a insulated cup with a lid and straw and some mints. I used hard peppermints but you could add the mint lifesavers or mint flavored gum. Fill the cup with the mint and attach the poem with a ribbon and your done!


Thursday, December 13, 2012

buckeyes Yum

I usually make the buckeyes with rice krispies.  Scott does not like them at all so this year I was looking through my candy recipes and found a recipe for buckeyes with no rice krispies so thought I would try them.  So I made these and had him try them.  He said they were good.  Then a few days later I saw him eating another one.  Well let me tell you him eating them again really means a lot.  So I thought I would share the recipe on here.   Hope you try them there really good.

Peanut Butter Buckeyes

 
Kids will have a ball making these rich treats. Although the centers are traditionally creamy, you can add graham crackers to the mix if you prefer crunchy.

Makes about 7 dozen buckeyes.

1 1/2 cups peanut butter
6 cups confectioners' sugar
1 cup (2 sticks) butter, softened
1/2 teaspoon vanilla extract
6 whole graham crackers, pulverized into crumbs (optional)
4 cups semisweet chocolate chips

Step 1
Line a cookie sheet with waxed paper; set it aside. Using a wooden spoon, mix together the peanut butter, sugar, butter, vanilla extract, and graham crackers, if desired, in a large bowl. (The dough will look dry.)

Step 2
Roll the dough into 1-inch balls. Set them on the prepared cookie sheet and insert a toothpick into each ball. Chill them in the freezer until hard, about 30 minutes.

Step 3
Melt the chocolate chips in a heatproof bowl set atop a pot of simmering water over medium-high heat. Stir continuously until smooth. Remove the pan from the heat. Using the toothpick as a handle, dip the balls into the melted chocolate, leaving a small circle at the top uncovered. Place the dipped candies back on the cookie sheet and refrigerate until the chocolate is set, about 2 hours. Store in an airtight container in the refrigerator.

Tuesday, December 11, 2012

Tasty Tuesady Fudge in the Microwave

Since Mindy made all those cookies Saturday I decided to make candy on Sunday I did not get as much done as her but I did get some made. 

Today I am going to share with you a idea a saw on pinterest it was for fudge in the microwave.  I went to the sight and realized it was the same recipe I use just made in the microwave.  So much easier.  And just as good.   Here is the recipe

 
Fudge

18 oz chocolate chips
1 can sweet condensed milk
pinch of salt
3/4 cup nuts
2 tablespoons butter or margarine
1 1/2 teaspoon vanilla

In heavy saucepan, over low heat, melt chips, butter, and sweet condensed milk. Stirring the whole time. Remove from heat, and add remaining ingredients. Pour in 9 inch square pan. Chill a few hours, then cut into squares.
Variation: White Fudge: Use 1 1/2 pounds white confectionery candy coating instead of chocolate chips
Now to make it in the microwave simply put choc chips, sweet condensed milk and butter in the microwave for 3 minutes.  Remove for microwave and stir till everything is melted add rest of ingredients and follow rest of directions. 

I am so glad I found this recipe I hated the stirring part of the original recipe.

Hint I line my 9 inch pan with aluminum foil to make it easier to remove the fudge

Stephanie